Create a Shipment
To create a new shipment:
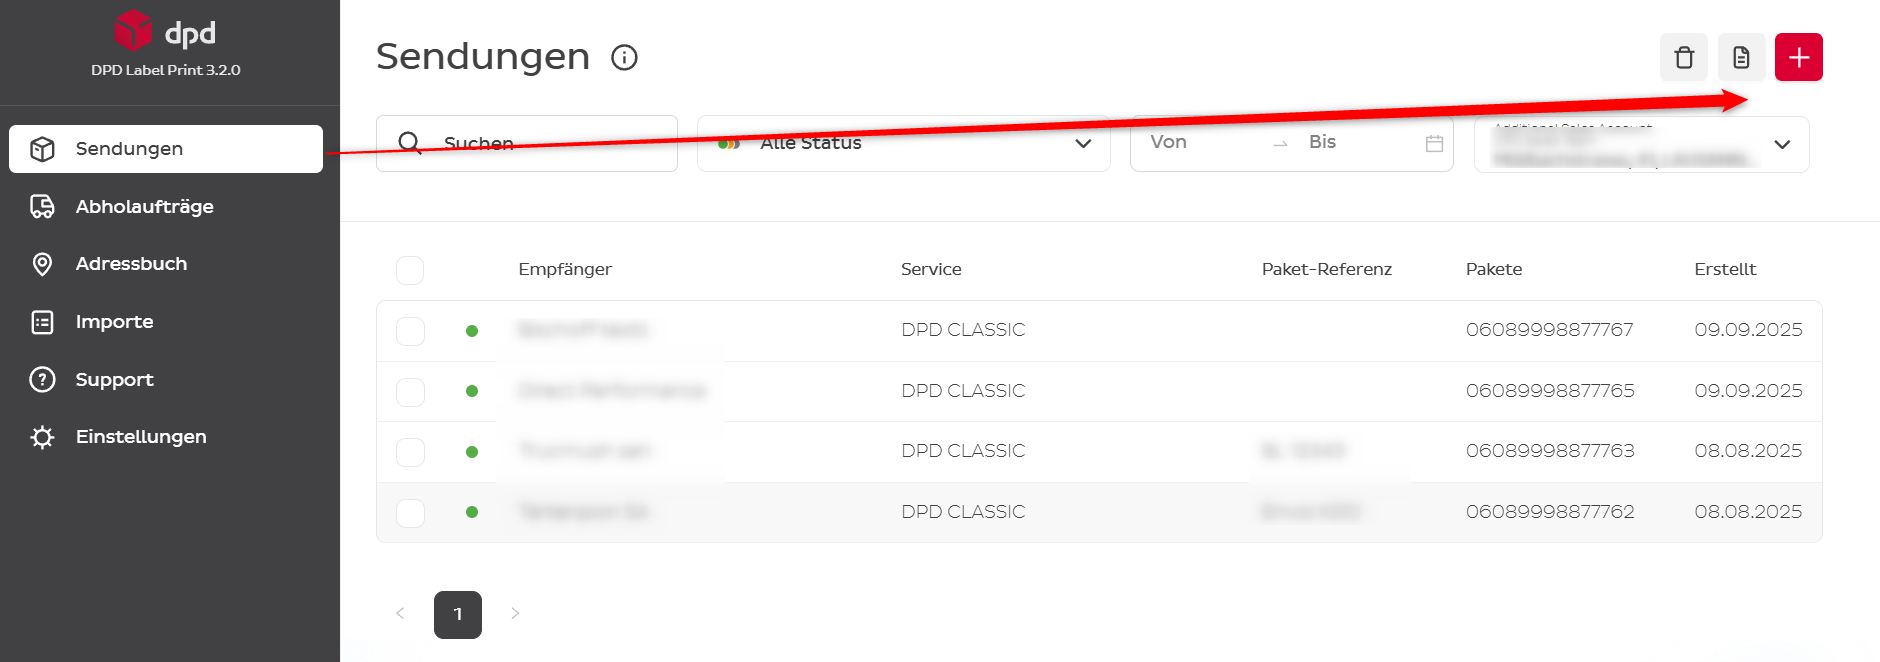
- Go to Shipments
- Click on the plus sign (+) at the top right
- A form for entering the consignment data will open
Alternatively, you can create a shipment from your address book:
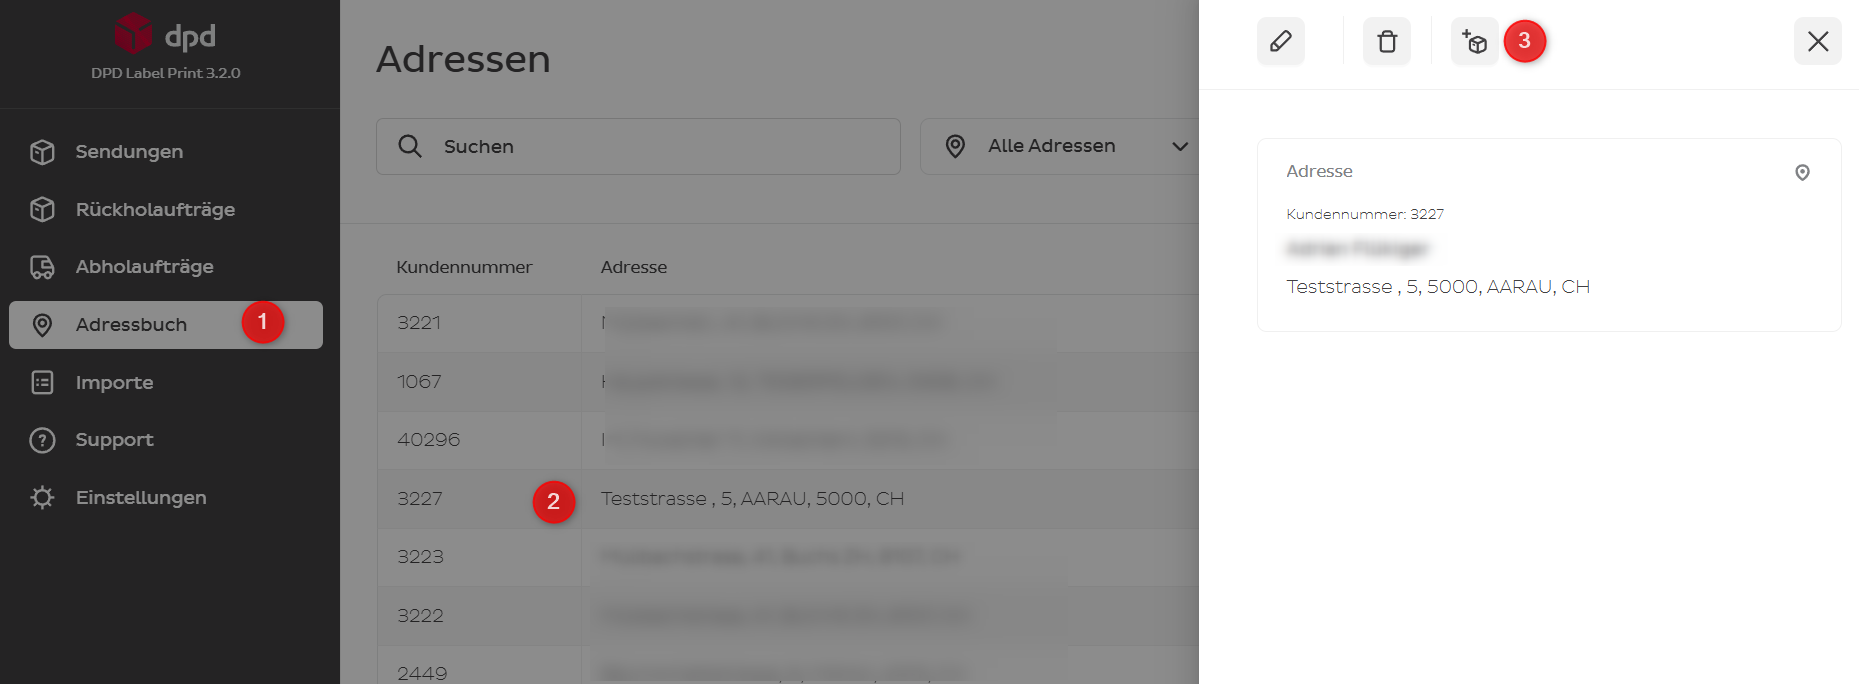
- Go to Addresses
- Click on an address — the address overview will appear on the right of the application
- Click on the box and you will be automatically transferred to Shipments; the recipient data will be pre-filled from the address book
![]()
Mandatory & Optional Fields
Fill in all mandatory fields so that the shipment can be created. Mandatory fields are marked with an asterisk (*). Typical mandatory fields:
- Recipient address
- Weight
- Shipping method
All other fields are optional and can be filled in if required.

There are special rules for creating shipments to Liechtenstein and Monaco:
- Liechtenstein: Enter the Liechtenstein postal code but select Switzerland as the country.
- Monaco: Enter the Monaco postal code but select France as the country.
Masking Address
The masking address is optional and is used to hide the actual sender's details on the shipping label by printing a fictitious sender address on the parcel. This information is not stored in databases and appears only on the printed labels.
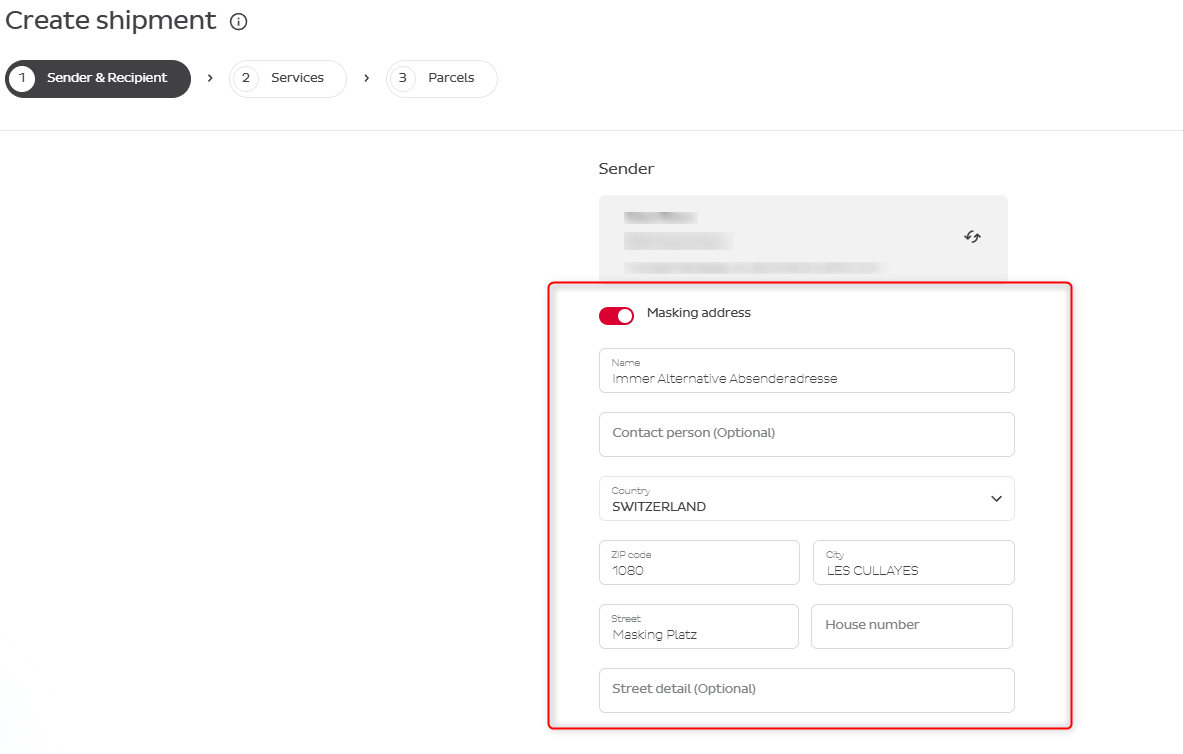
In Settings → Default Settings → Sender Data → Masking Address you can set up a default masking address to be printed on your labels.
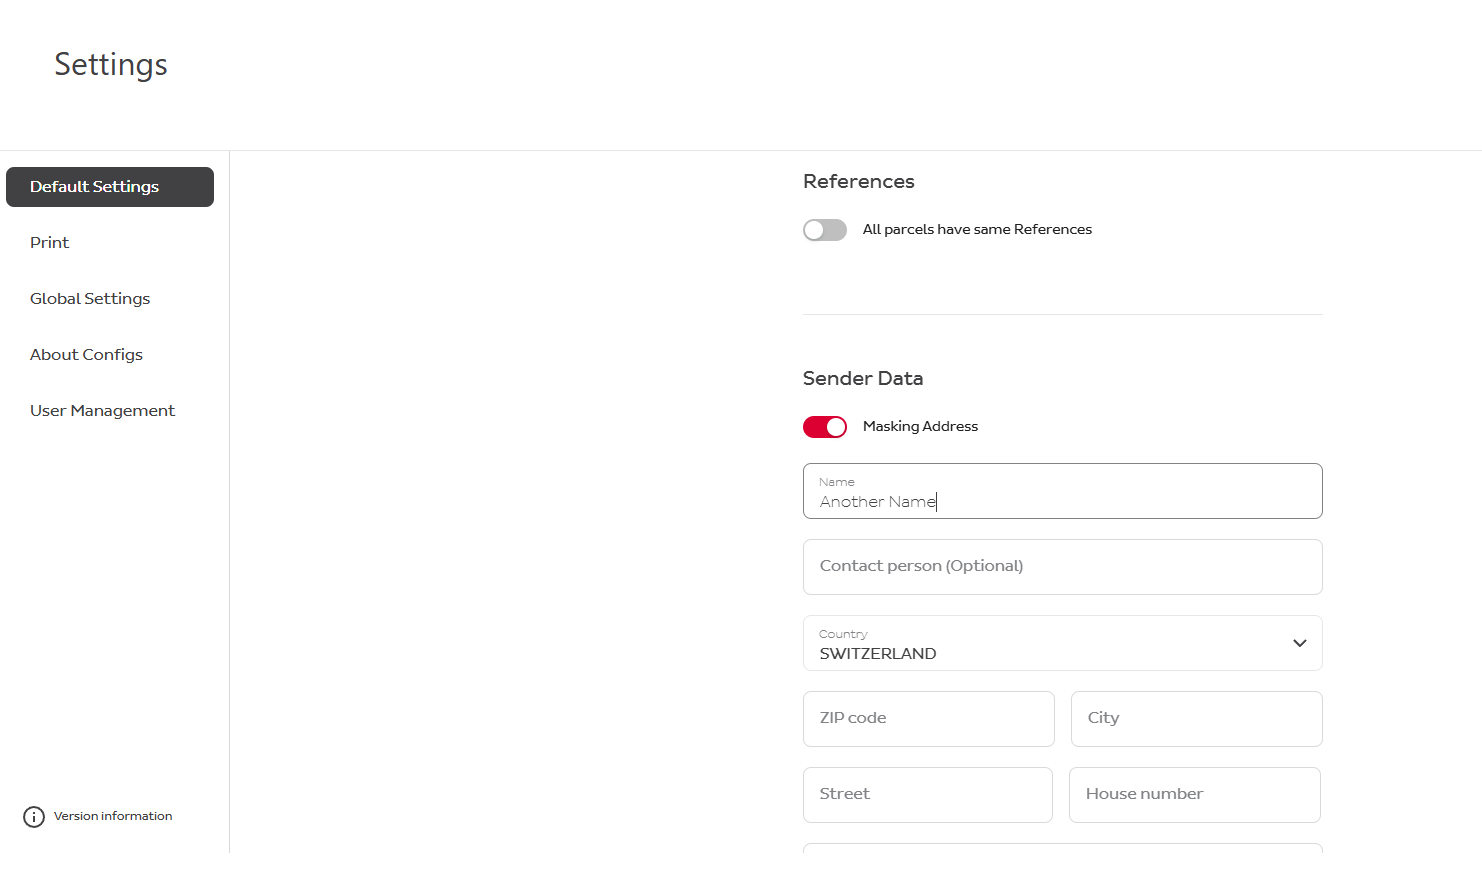
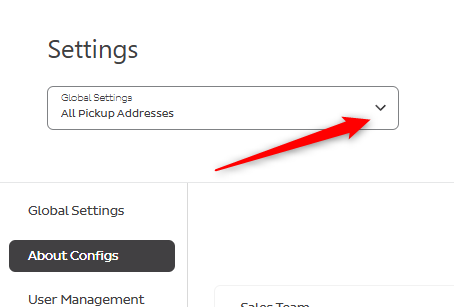
If you have several pick-up addresses, you must first choose the corresponding pick-up address before the Default Settings appear in the menu list.
Selection of Services
Selecting a Service
When information about the sender and recipient has been filled out, choose the DPD service for the shipment.
Information about differences in services can be found at DPD Switzerland — Send Parcels. This page also lists offered DPD Express services and limitations.
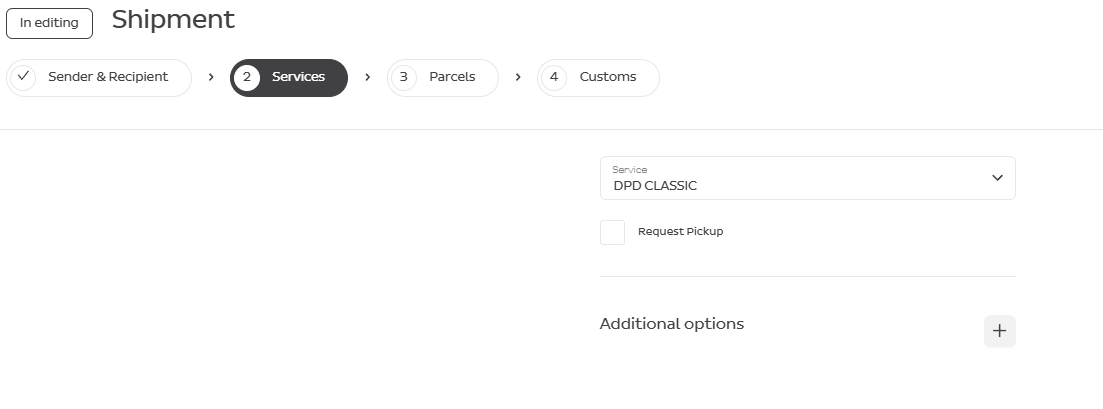
If you want to apply supplementary insurance, press Additional options.
Additional Options
Other available additional options that you might have are:
- Limited Quantities
- Return
- SWAP
- TYRE
Request Pickup
Clients with small volumes of parcels can request a pick-up and choose a date by ticking the box.
We strongly recommend using the separate menu button "Pickup orders" for a better overview of your requests.
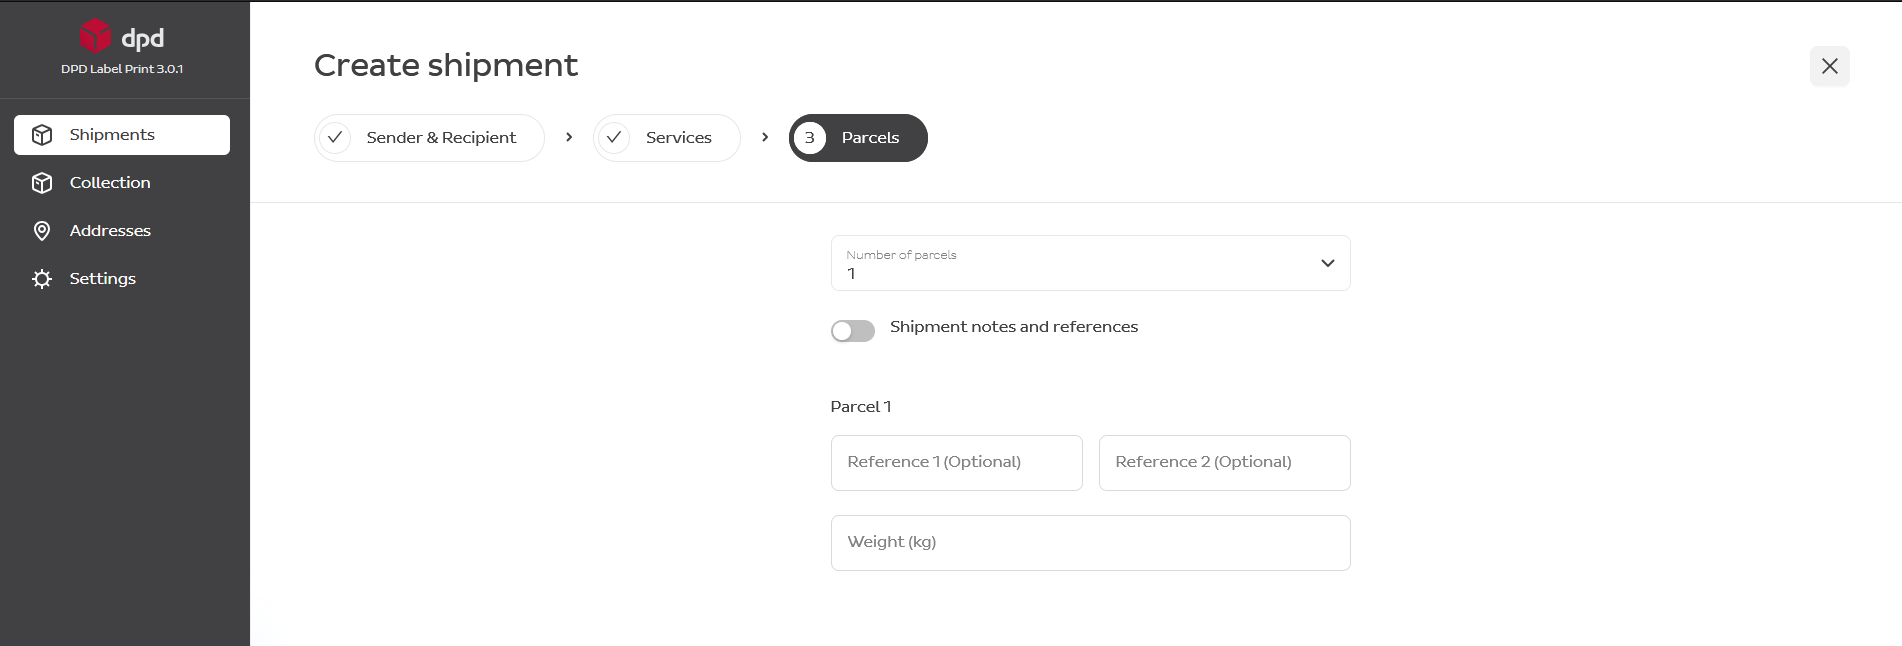
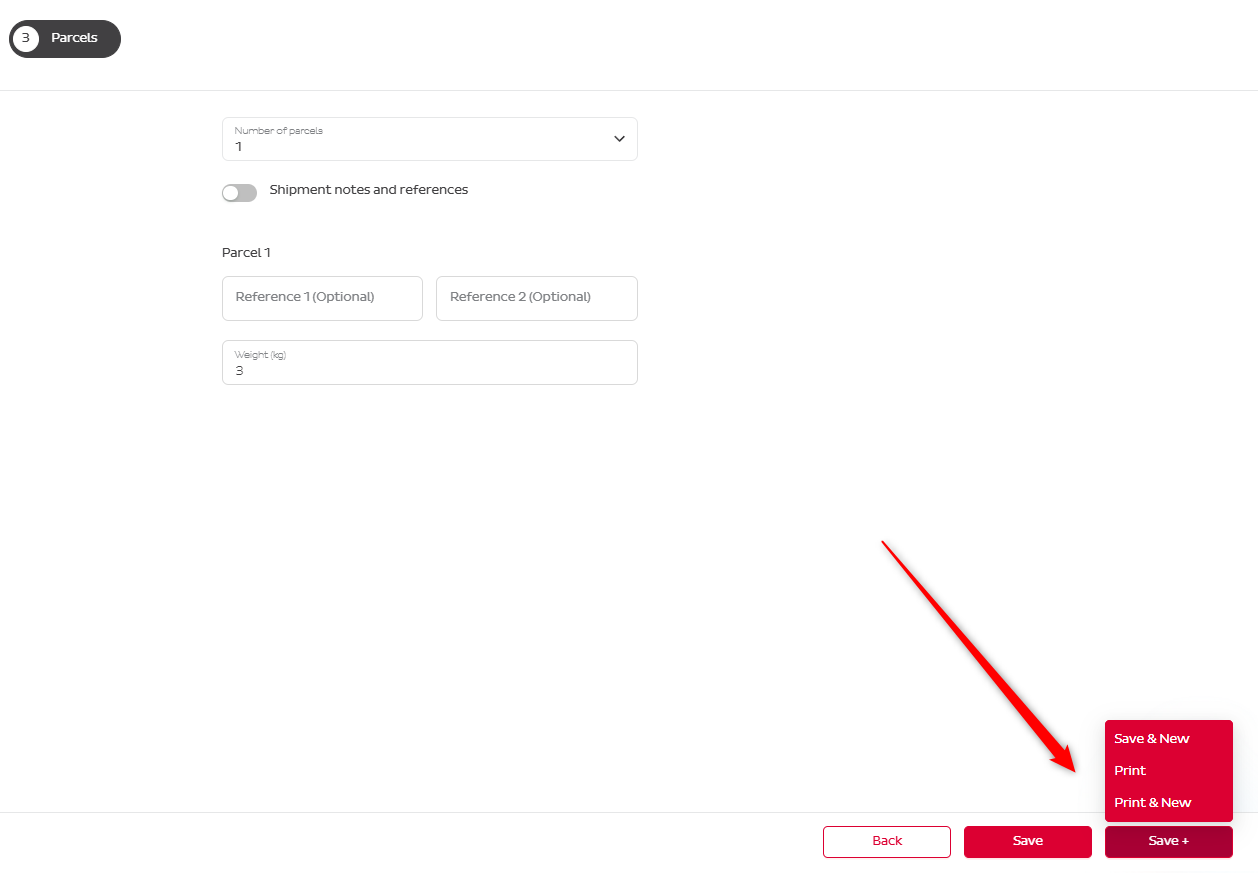
Parcel Details
After choosing the service, indicate the number of parcels, weight information, and optional references.
Label Printing
There are 3 options to print the label.
Directly After Creating a Shipment
Select Several Shipments and Print Labels at Once
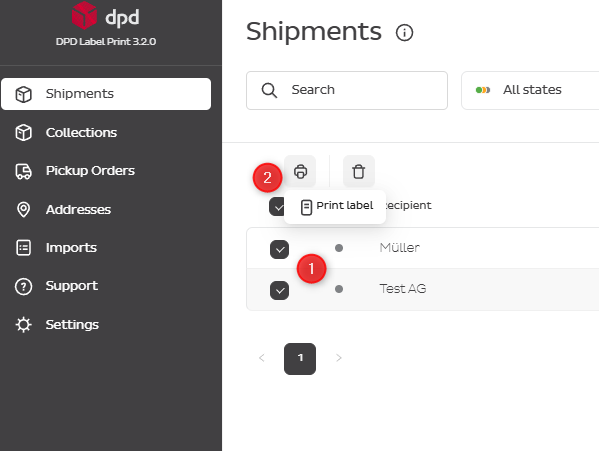
Review the Created Shipment and Print the Label
Click on any shipment with grey status — the shipment details will appear on the right side. Click the Print icon to print the label.

Print Settings
Go to Settings → Print → Label.
Based on your preferences and printer requirements, you can adjust:
- Paper size: A4 or A6
- Label content: Whether the parcel reference or shipment note should appear larger than normal on the label
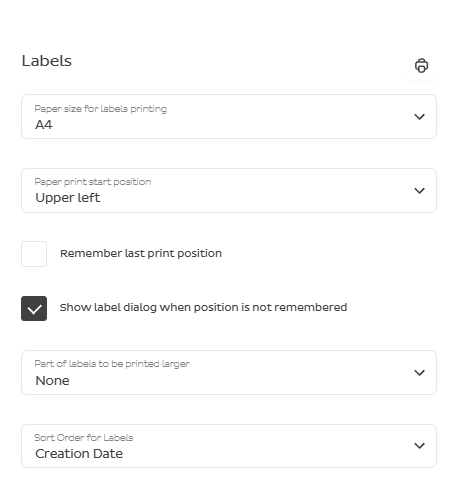
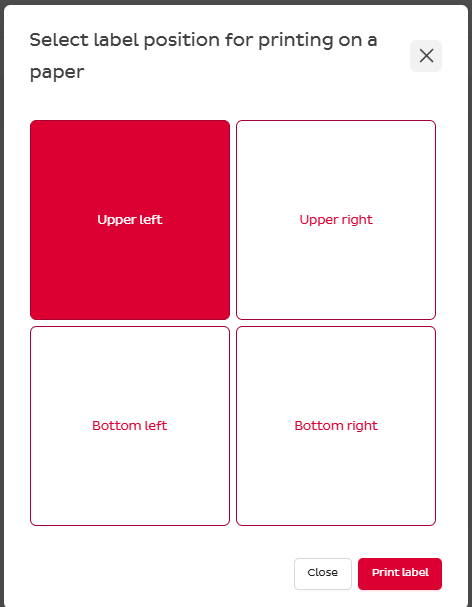
You can choose the label position on the A4 page before each print, or let Label Print do it automatically.
- Remember last print position — the label will be printed on the next applicable position on the A4 page
- Show label position dialog when position is not remembered — a pop-up window will appear before printing the label: