Quick Guide
This Quick Guide is aimed at users of the Label Print application. It explains the basic steps for using the software, in particular the creation of consignments.
1. Introduction & Login
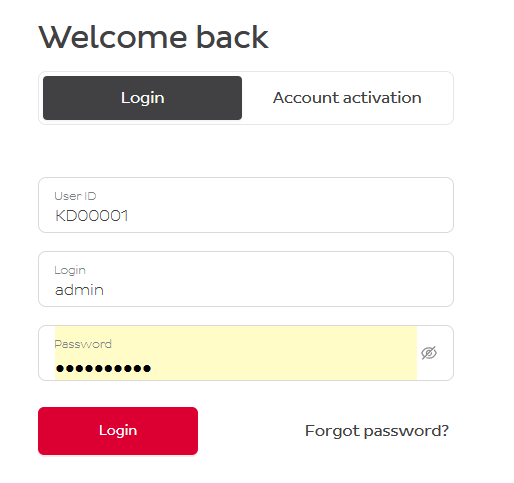
To successfully log in to the application, please proceed as follows:
- Start the application: https://label-print.dpd.ch/login
- Use the access data provided:
- User ID
- Login
- Password
Please note that your login credentials are linked to the unique e-mail address for the password reset.
After successful login, the start page will appear.
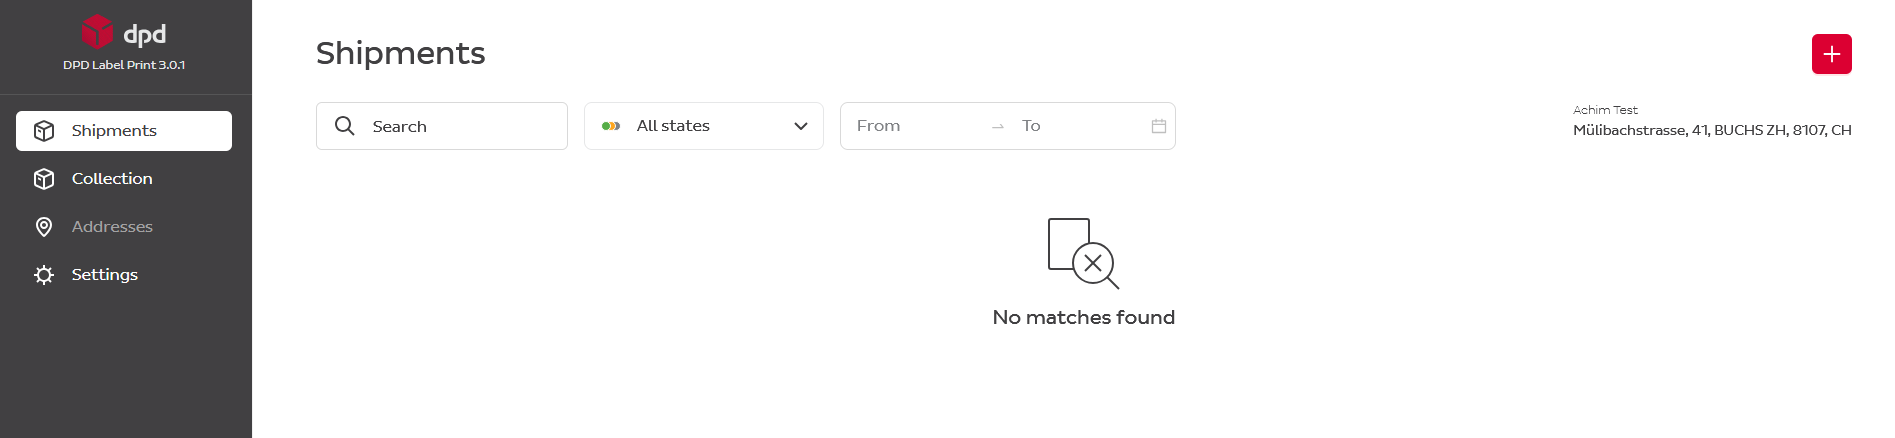
2. Homepage
After logging in, you will see the overview page of the application. This displays the option to create a shipment and the most recently created consignments.
If your User account has access to several pick up addresses, you can check them in the top right corner by clicking on the pick up address.
The interface language is linked to your browser language. If you want to change it, click on your name in the bottom left corner of the page.
3. Create Shipment
To create a new shipment:
- Go to Shipments
- Click on the plus sign (+) at the top right.
- A form for entering the consignment data will open.
Alternatively, you can create a shipment from your address book:
- Go to Addresses
- Click on an address and the address overview will appear on the right of the application.
- Click on the box and you will be automatically transferred to Shipments. The recipient data will be pre-filled from the address book.
3.1 Input Fields: Mandatory & Optional
Fill in all mandatory fields so that the shipment can be created. These are marked with an asterisk (*). Typical mandatory fields:
- Recipient address
- Weight
- Shipping method
All other fields are optional and can be filled in if required.

Please note that there are special rules for creating shipments to Liechtenstein and Monaco:
- For Liechtenstein shipments, enter the Liechtenstein postal code but select Switzerland as the country.
- For Monaco shipments, enter the Monaco postal code but select France as the country.
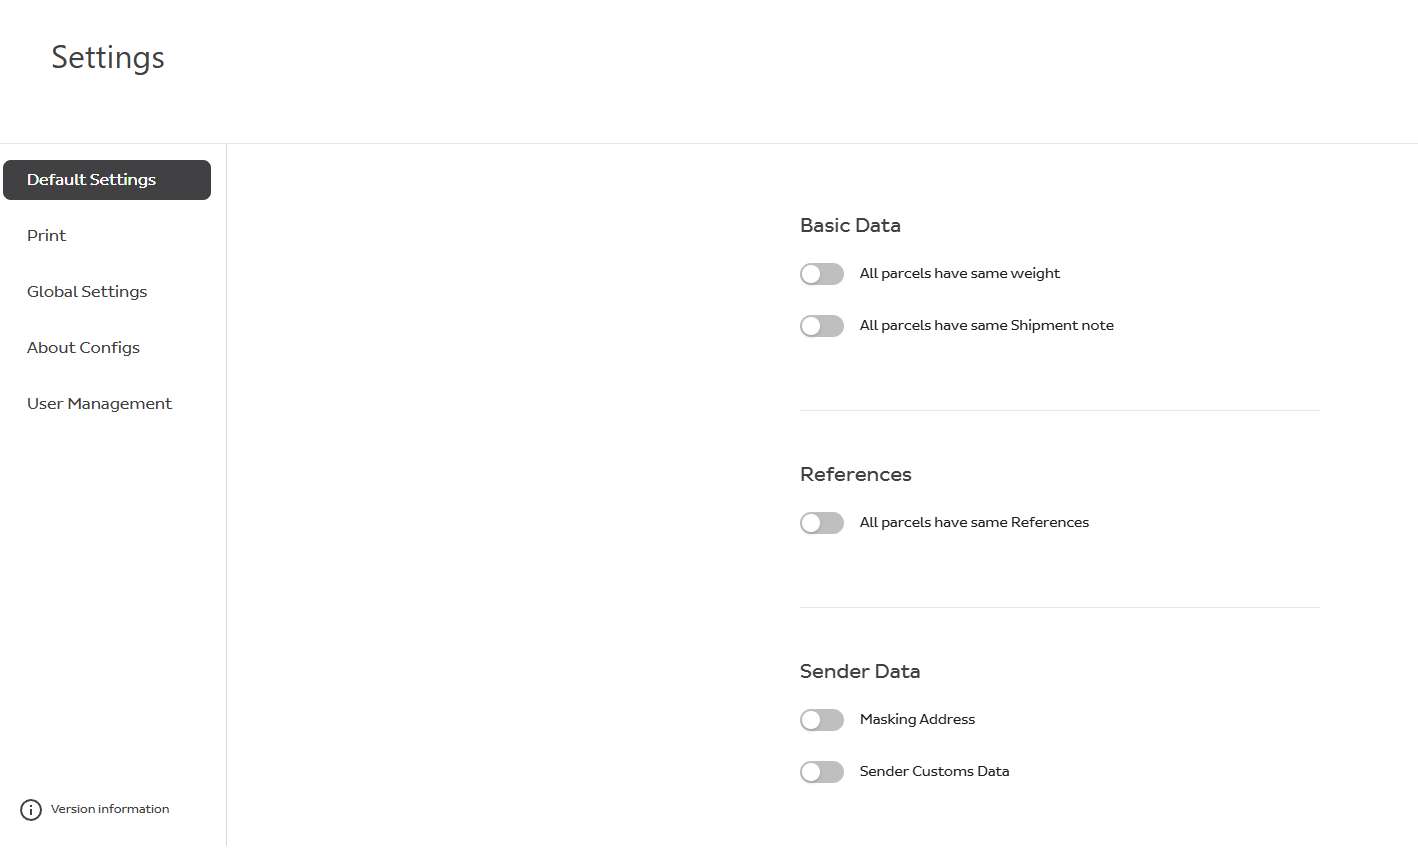
3.2 Masking Address
Masking address is optional and is used to hide the actual sender's details on the shipping label by printing a fictitious sender address on the parcel. This information is not stored in databases and appears only on the printed labels.
In Settings → Default Settings → Sender Data → Masking Address, you can define a default masking address that you can choose to display on your labels.
If you have several pick up addresses, you must first choose the pick up address, and then the default settings will appear in the Menu list.
3.3 Selection of Services
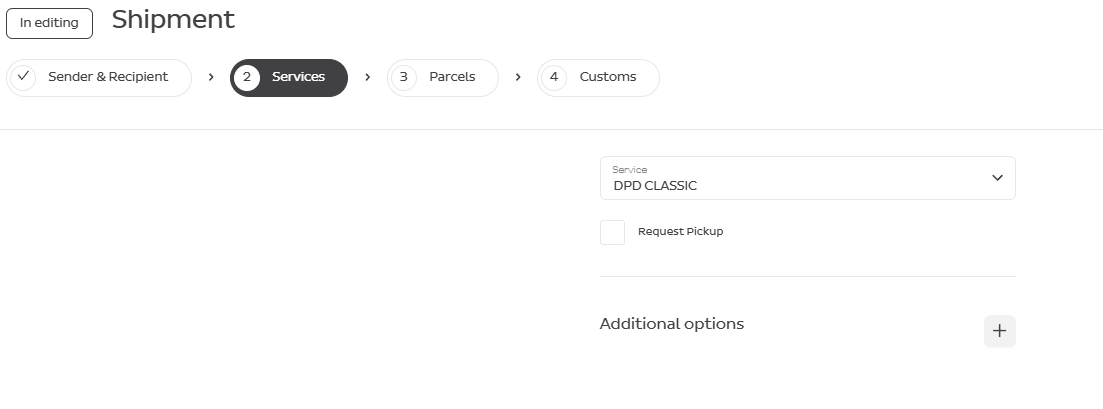
3.3.1 Selecting a Service
When information about sender and recipient is filled out, choose the DPD service for the shipment.
Information about differences in services can be found here: Pakete versenden Schweiz | DPD
On this page you will also find a list of offered DPD Express services and limitations.
If you want to apply Supplementary insurance, press Additional options.
3.3.2 Additional Options
Other available additional options that you might have are:
- Limited Quantities
- Return
- SWAP
- TYRE
3.3.3 Request Pickup
Clients with small volumes of parcels can request a pick up and choose a date for it by ticking the box.
We strongly recommend using the separate menu button "Pickup orders" so you can have a better overview of your requests.
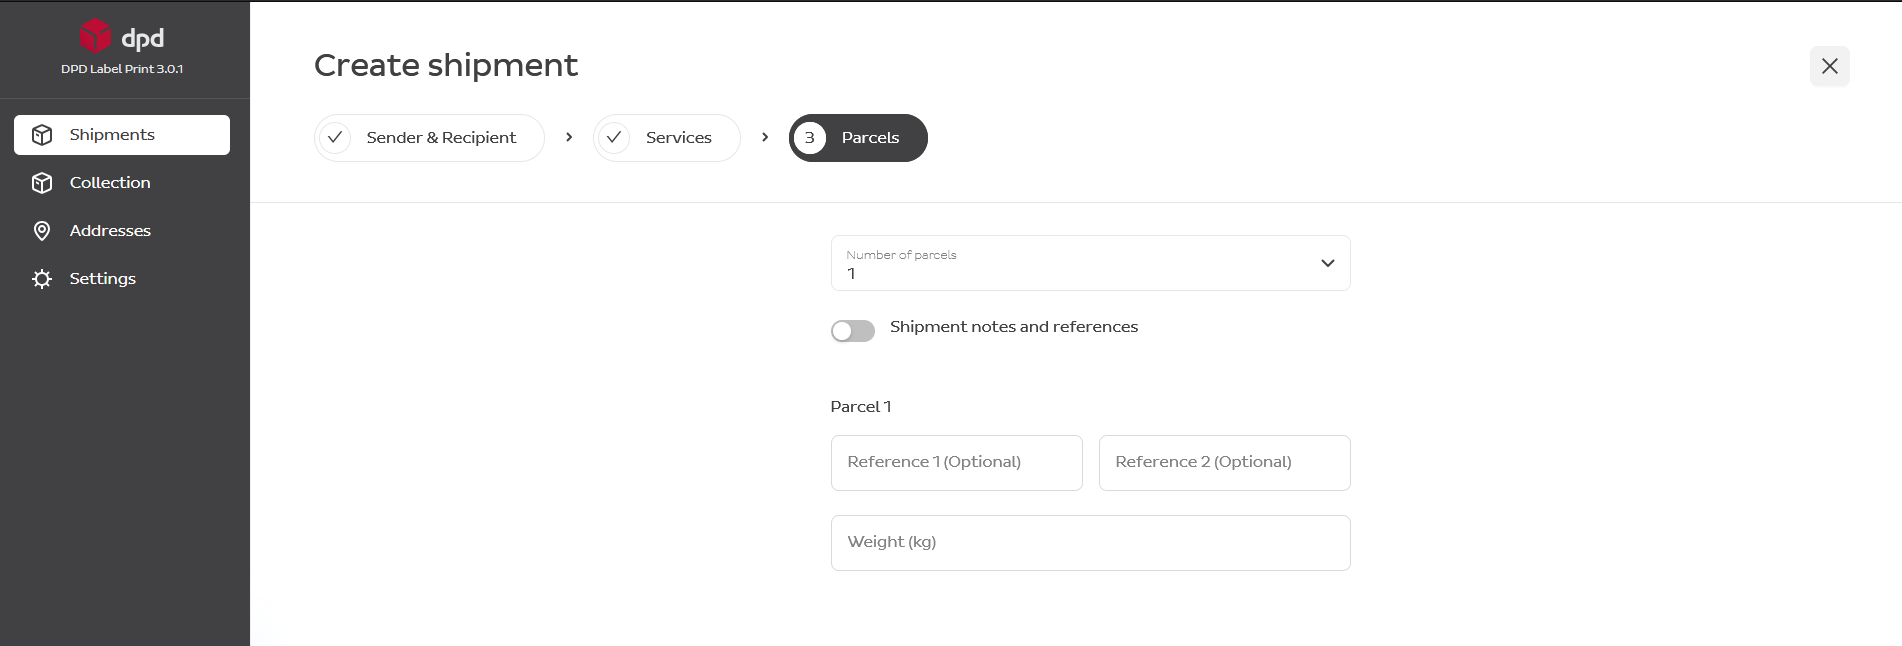
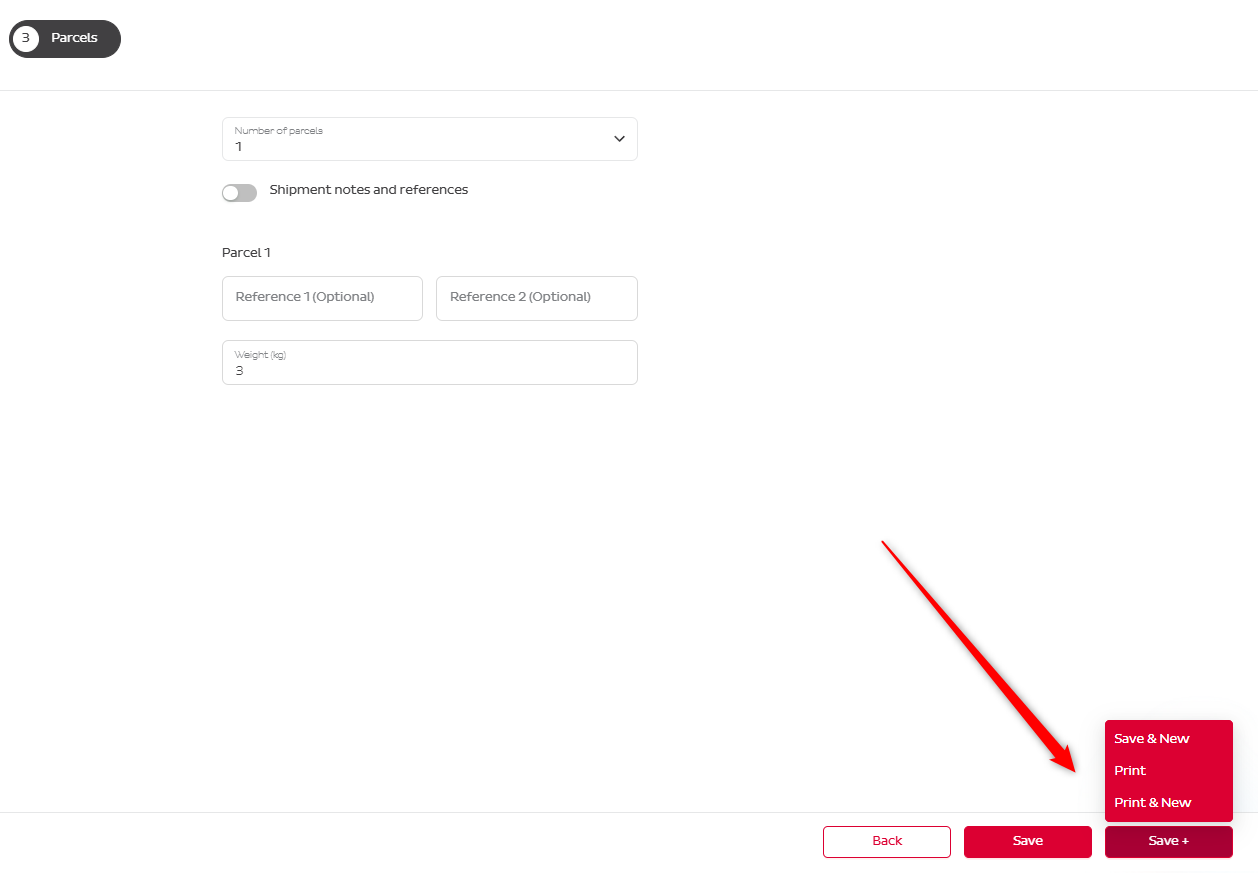
3.4 Parcel Details
After choosing the service, indicate the number of parcels, weight information and optional references.
3.5 Label Printing
There are 3 options to print the label.
3.5.1 Directly After Creating a Shipment
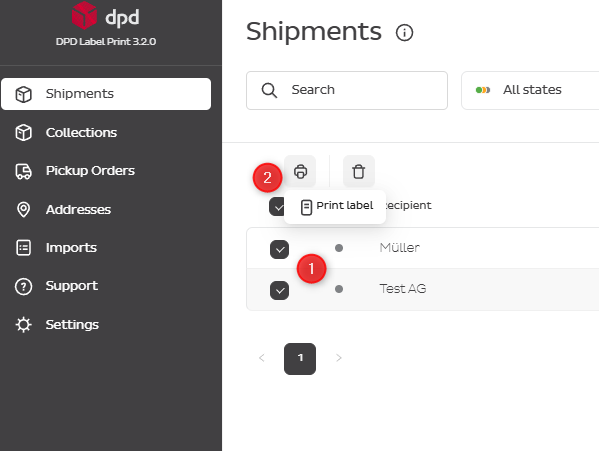
3.5.2 Select Several Shipments and Print Labels at Once
3.5.3 Review the Created Shipment and Print the Label
Click on any of the shipments with grey status and on the right side the shipment details will appear. Click on the Print icon to print the label.
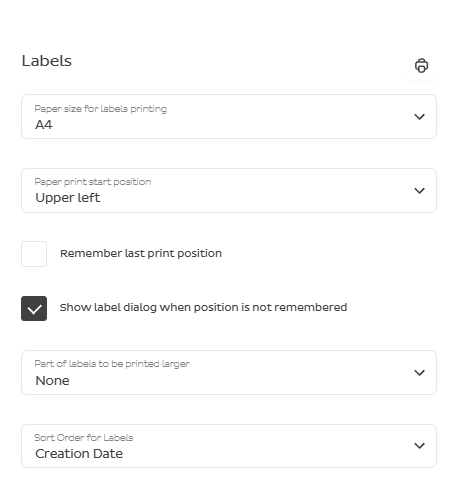
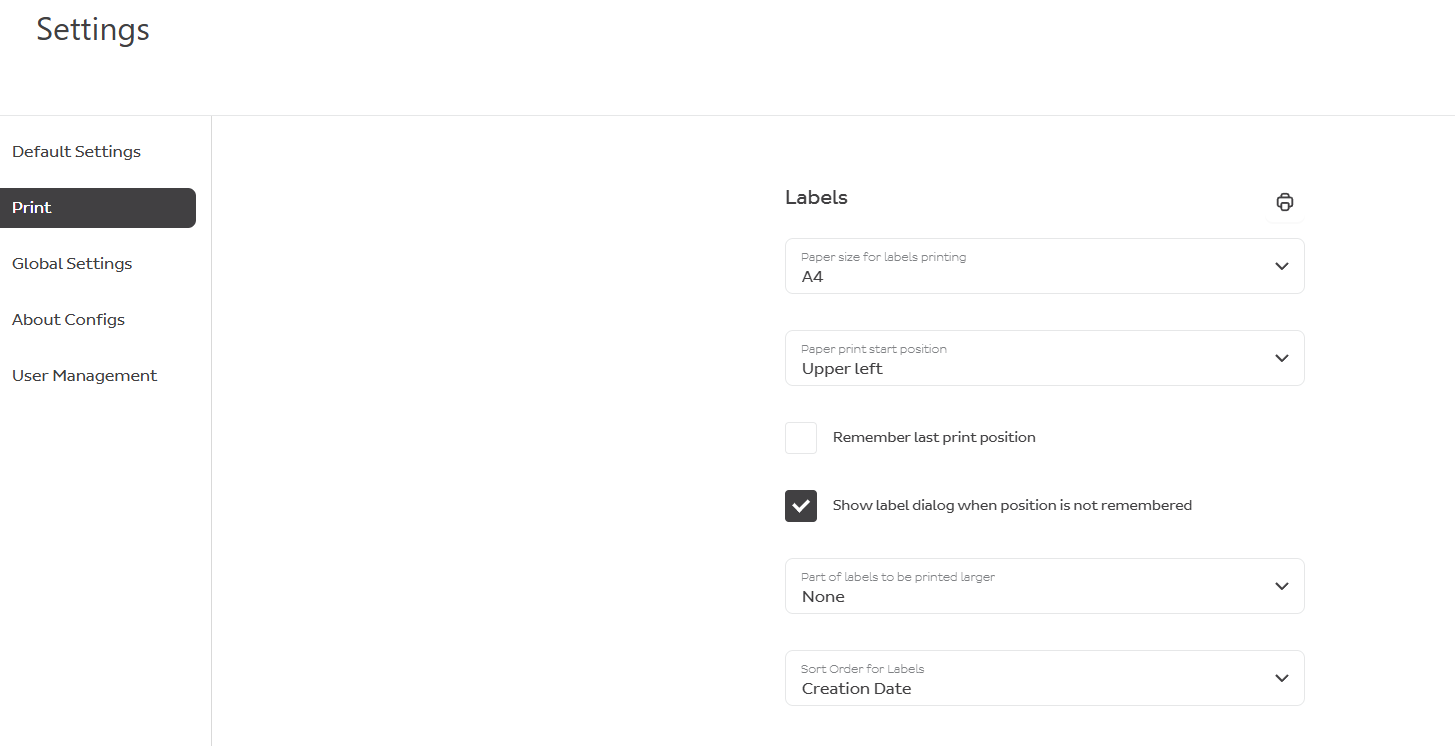
3.5.4 Print Settings
Go to Settings → Print → Labels
Based on your preferences and printer requirements you can adjust:
- Paper size (A4 or A6)
- Whether the parcel reference or shipment note should appear larger than normally on the label
You can choose the label position on the A4 page before each printing, or you can have Label Print do it automatically.
If you tick the box Remember last print position, the label will be printed on the next applicable position on the A4 page.
If you want to select the position each time, tick the box Show label position dialog when position is not remembered, and a pop-up window will appear before printing the label.
4. Managing Shipments
4.1 Editing
When you click on the box in front of the shipment, buttons on top of the list will appear, and you can operate with shipments:
- Edit
- Duplicate
- Delete
Please note that you can edit and delete shipment information until the label is printed.

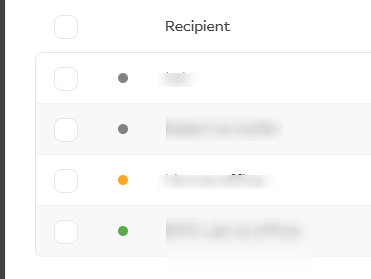
4.2 Status of Shipment
The status colour remains grey until the label is printed, and you can still make changes.
The yellow status should not last longer than 15 minutes. It indicates that the label has been printed, but DPD has not yet processed the shipment data.
The green status indicates that the data transfer to DPD systems has been successfully completed after the label was printed.
You can filter shipments by their status.
| Colour | Meaning |
|---|---|
| Grey | Label has not been printed yet — changes can still be made |
| Yellow | Label has been printed, but DPD has not yet processed the shipment data (max. 15 minutes) |
| Green | Data transfer to DPD systems successfully completed |
| Blue dot | Manifest printed (filter only) |
| Red dot | Manifest not printed (filter only) |
5. Manifests
A manifest is a PDF document that provides a list of all parcels being prepared for collection by the DPD driver. It can optionally contain:
- Pick up address
- Roll-up depot address
- Parcel tracking number
- Recipient addresses of parcels
- Parcel weight
We suggest printing the manifest before each pick up and giving it to the driver, so they can sign the collection of the parcels.
You can print the manifest for selected shipments by clicking on the printer icon.
If you print manifests every day, we suggest choosing a date in the calendar (today) and then marking all shipments to print a single manifest.
Displayed information on the manifests can be adjusted in Settings → Print → Manifests.

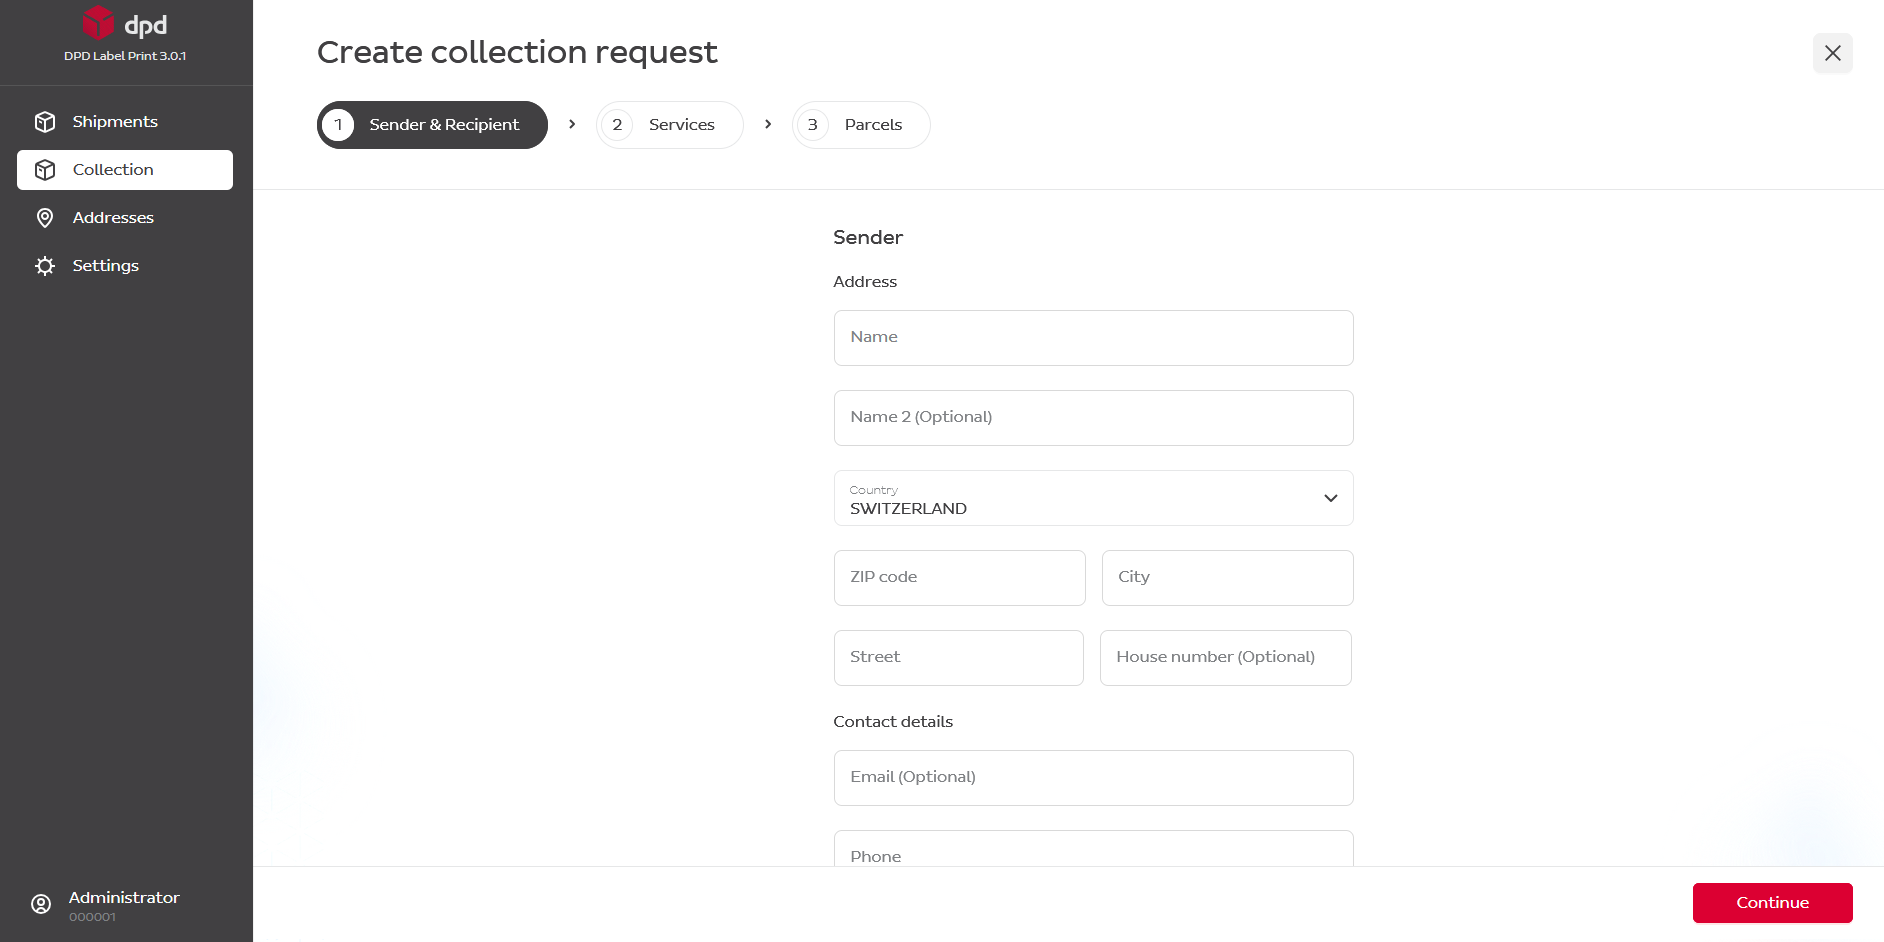
6. Create a Collection Request
If you have to arrange a collection of goods from another place to you (or another delivery location), you can create a collection request.
The process is very similar to creating a shipment, except labels will not be printed for this shipment — the DPD driver will bring the label and attach it to the parcel during collection.
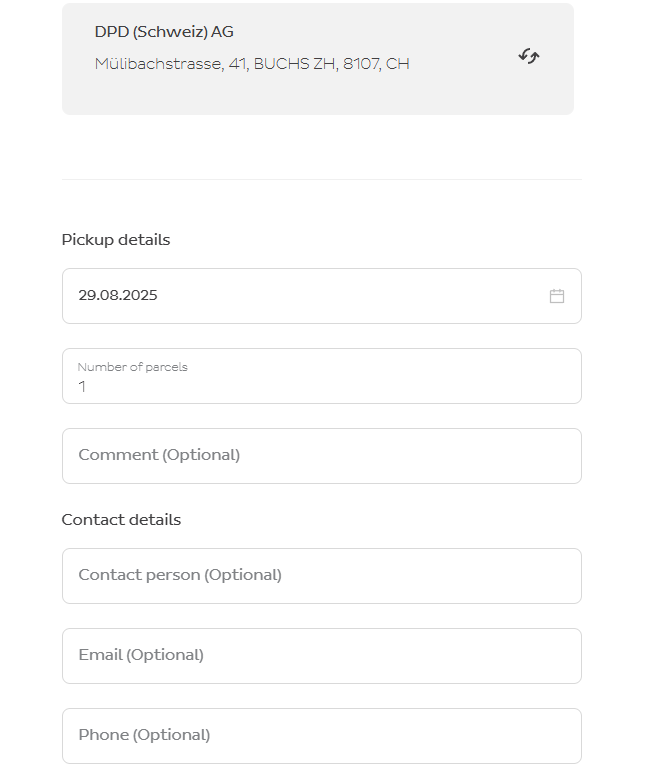
7. Pick Up Orders
If you don't have an agreement about daily/weekly pick ups, you can arrange the pick up of your parcels on demand.
For clients with daily pick ups, this menu item may not be present.
To create a pickup request, press the red button with + at the top right.
If you have several pick up addresses, be sure to choose the correct pick up place.
Choose the day and estimated number of parcels.
8. CSV File Import
8.1 Create a Profile
If you wish to send packages to a large number of recipients, you can use the File Import function.
Before importing the file, you must create an import profile.
- Go to DPD Label Print → select Profiles → Addresses or Shipments → press +
- Select Import Type → Addresses or Shipments
- Add the Profile Name (e.g. address book)
- Select Import File Type → CSV
The rest can remain as default.
- Press Continue
- Press Upload File
- Press Process File
- Map the field names according to the header names in your CSV file.
If you have a CSV file without a header, the drop-down list consists of Position 0, 1, 2 etc. The first column (A) in the CSV file corresponds to Position 0.
The Function column can remain as is.
If necessary, add a Transformation, which is created and used when data from the CSV file needs to be adapted for import. For example, use this when the country name in your file is "Switzerland" but our system needs it in ISO 3166-1 alpha-2 format ("CH").
Once all mandatory (and optional) field names are entered, press Save.
![]()
8.2 Upload the CSV File
- Go to File Imports
- Press Import File in the top right corner
- Choose the Profile (the name you entered in step 1)
- Upload the CSV file and press Import
- Press Refresh
The imported information should appear in your address book or shipments.
8.3 Technical Requirements for CSV File
The system supports flexible CSV formats with automatic header detection and multiple encoding/delimiter options.
8.3.1 Character Encoding
Choose one of the supported encodings:
| Encoding | Use Case | Notes |
|---|---|---|
| UTF-8 | Recommended for all files | Universal support, handles all special characters |
| ISO-8859-1 | Western European languages | German umlauts (ä, ö, ü), French accents |
| Windows-1251 | Cyrillic characters | Ukrainian, Bulgarian |
Tip: Save your CSV as UTF-8 in Excel: File → Save As → CSV UTF-8 (Comma delimited)
Field Delimiters:
| Delimiter | Symbol | Excel Export (Region) | Use When |
|---|---|---|---|
| Semicolon | ; | European Excel (DE/FR/IT) | Recommended for European locales |
| Comma | , | US/UK Excel | Data doesn't contain commas |
| Tab | \t | Manual export | Data contains many special characters |
| Pipe | | | Database exports | Technical integrations |
Important: Your data must not contain the delimiter character, or it must be properly quoted.
8.3.2 CSV Header Format
Headers must start with a letter (A-Z, a-z) or underscore (_).
Allowed characters in headers (after the first character):
- Letters: A-Z, a-z
- Numbers: 0-9
- Underscore:
_ - Hyphen:
- - Dot:
. - Space
- Parentheses:
( ) - Forward slash:
/ - Colon:
: - Ampersand:
& - Comma:
,
Not allowed as first character: Numbers, special symbols ($, #, @, !, etc.)
Valid header examples:
Name;Address1;PostalCode;Country
DokStatus;DokDat.;Order_Nr;Weight.KG
Customer Name;Street & Number;Date/Time;Status (Active)
recipient_name;recipient_address;tracking-number
Invalid header examples:
123;456;789                (starts with number)
$Amount;#ID;@Email         (special chars: $, #, @)
;Name;Address              (empty first column)
8.3.3 Header Detection
The system automatically detects whether the first row is a header by analysing:
-
Header characteristics:
- Contains at least one letter
- Not purely numeric (e.g. "123" is not a header)
- Matches the allowed character pattern
-
Data characteristics:
- Second row contains numbers, emails, or significantly different text
- Length difference > 3 characters from header
| First Row | Second Row | Detection Result |
|---|---|---|
Name;Address;Weight | John Doe;Main St 1;2.5 | Header (letters vs text/numbers) |
Customer;Order;Total | ACME Corp;12345;99.99 | Header (text vs numbers) |
123;456;789 | 111;222;333 | No header (all numeric) |
Active;Pending;Done | Active;Done;Pending | Ambiguous (similar text lengths) |
8.3.4 CSV Configuration Parameters
| Parameter | Type | Description | Example Values |
|---|---|---|---|
| columnDelimiter | String | Character separating fields | ; , \t | |
| decimalSeparator | String | Decimal point for numbers | . (US) or , (EU) |
| multiValueDelimiter | String | Separator for multi-value fields | | ; , |
| containsHeader | Boolean | Whether first row is a header | true / false |
Decimal separator examples:
European format (comma as decimal):
Name;Weight;Price
Product A;2,5;19,99
Product B;1,8;15,50
US format (dot as decimal):
Name,Weight,Price
Product A,2.5,19.99
Product B,1.8,15.50
8.3.5 Creating CSV Files from Excel
-
Prepare your data:
- First row = headers
- Ensure no empty rows at the top
- Check for consistent column count
-
Save as CSV:
- European (semicolon): File → Save As → CSV (Semicolon delimited) *.csv
- UTF-8: File → Save As → CSV UTF-8 (Comma delimited) *.csv
- US (comma): File → Save As → CSV (Comma delimited) *.csv
-
Verify encoding:
- Open file in Notepad/TextEdit
- Check that special characters (ä, ö, ü, é) display correctly
8.3.6 Common Issues & Solutions
Special characters display incorrectly
Problem: Müller appears as Müller
Solution:
- Save file as UTF-8 encoding
- In Excel: Use "CSV UTF-8" format, not regular CSV
- Verify in text editor that special characters look correct
Numbers are not recognised
Problem: 2,5 is treated as text instead of a number
Solution:
- Set
decimalSeparatorto match your file format - European:
"decimalSeparator": "," - US/International:
"decimalSeparator": "."
Wrong delimiter
Problem: All data appears in the first column
Solution:
- Check the actual delimiter in your file
- European Excel uses
;(semicolon) - US Excel uses
,(comma) - Set the correct
columnDelimiter
Header not detected
Problem: The system treats the header row as data
Solution:
- Ensure headers start with letters, not numbers
- Explicitly set
"containsHeader": true - Check that data rows are different from headers (numeric or different lengths)
Empty rows or extra columns
Problem: Import fails or has unexpected columns
Solution:
- Remove empty rows at the top of the file
- Ensure all rows have the same number of columns
- Remove trailing delimiters
Pre-import checklist:
- File encoding is UTF-8 (or appropriate for your language)
- Delimiter matches configuration (semicolon for Europe, comma for US)
- Headers start with letters (if using headers)
- No empty rows at the top
- Consistent column count across all rows
- Decimal separator matches your number format
- Special characters (ä, ö, ü, é) display correctly in text editor
- No trailing spaces or delimiters
- File size is reasonable (< 25 MB recommended)
9. Settings
9.1 Default Settings
Note: If you have several pick up addresses, you must first choose one for the default settings to appear in the Menu list.
9.2 Print Settings
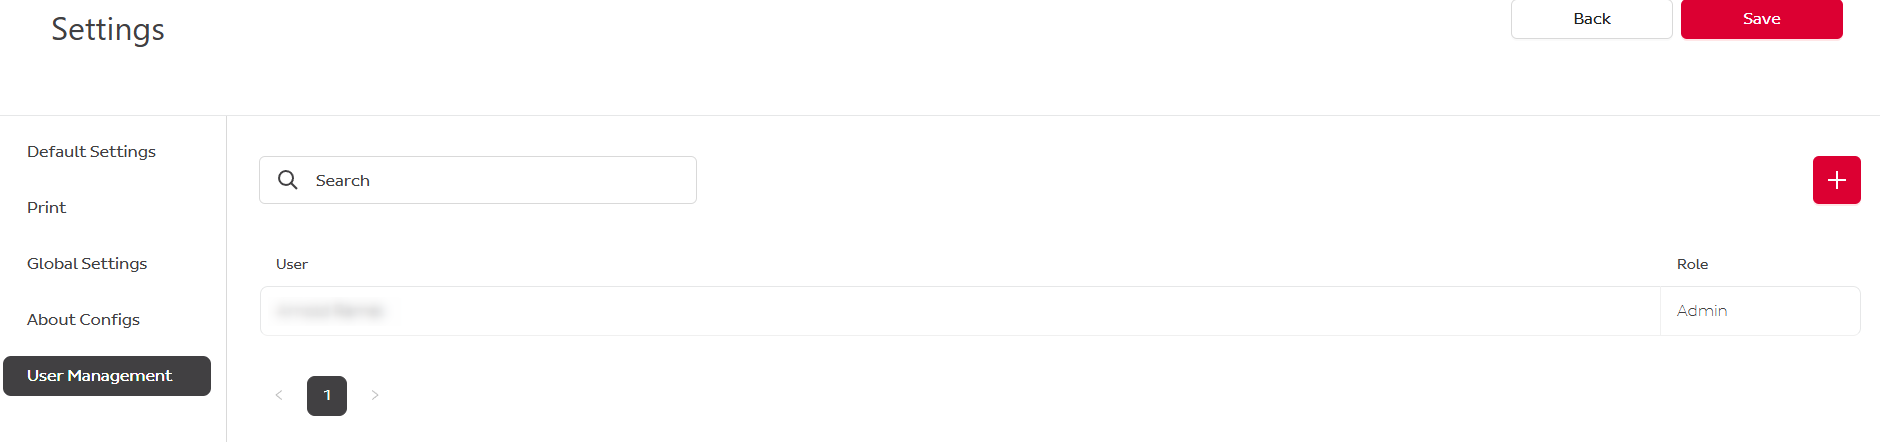
9.3 User Administration
An administrator can create other administrators and users and manage their access (choosing services and pick-up addresses, if you have several pick up locations).
To create a user, go to Settings → User Management → +.
Please note that all Label Print users must have a unique e-mail address.
When creating a User, make sure you have added the address and Services and Options, otherwise the User will not be able to log in or create a shipment.
To change or delete a User, click on the name and then click in the top right corner.
10. Additional Notes
- Make sure that all entries are correct before you save the programme.
- If you have any problems, please contact IT support.
Contact:
DPD (Schweiz) AG CIT Migration Team labelprint@dpd.ch